ESE Block 5 Button LED
So far we have only used very simple library elements. For the next task we will use more complex library elements with more extensive functionality. We will see how highly developed components from the PEC library make our work easier. To do this, we are setting ourselves a somewhat more complex task.
The task
 A microcontroller application is to be developed in which a new function is selected by clicking a button and visualized by means of an LED blink code.
The solution should meet the following requirements:
- at system start the indicator LED is off
- if the user briefly presses (click) the function key, the indicator LED should show a blink code
- with every further click the blink code of the ad should be counted again
- 1 time click = blink code 1, 2 times click = blink code 2, 3 times click = blink code 3
- etc.
- if the user presses the function key for a long time (hold for 2 seconds) the indicator LED is to be switched off
- Function key on pin A0, display LED on pin B0
Preparation
Perform the following preparatory work:
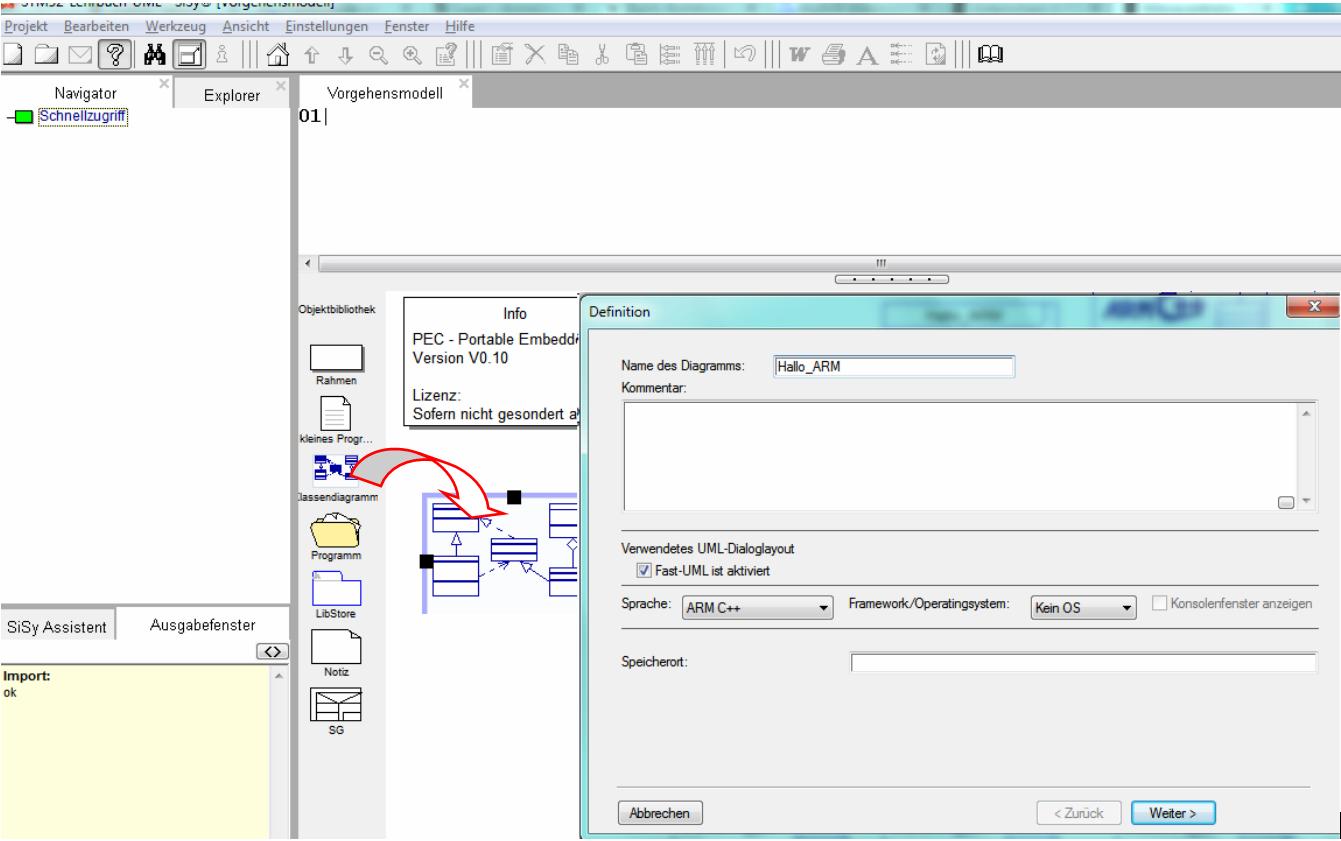
- create a new class diagram
- Target language ARM C ++
- Target platform STM32F042 mySTM32 Board light HAL
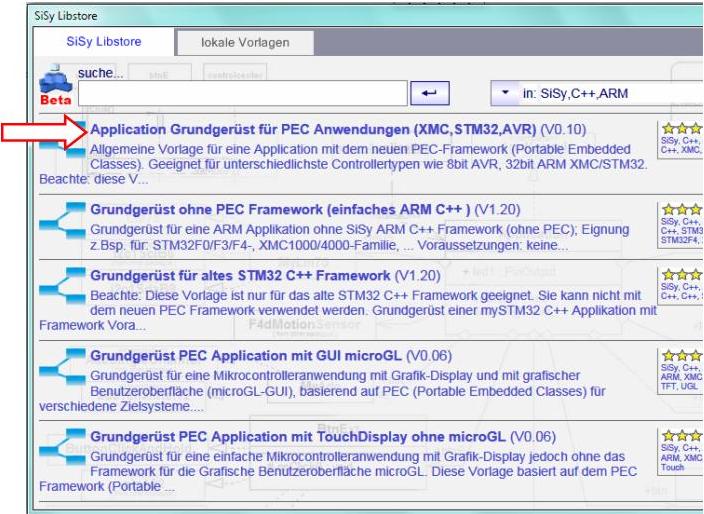
- Load diagram template application framework for PEC applications (XMC, STM32, AVR)
- Assign driver package for STM32F0
- optional template stm32F042_48Mhz assign

Solution idea
So the task is to distinguish between clicking and holding the function key. Let's look around in the PEC library and the library block PecButtonClickAndHold appears. First we compare this new block with the previously used PecPinInput.


The difference is quite clear when looking at the elements. The PecPinInput can actually only be configured and the status queried. The PecButtonClickAndHold, on the other hand, seems much more complex. It also has the characteristics of PecPinInput but we mainly notice the is a relationship to the PecAppModul and the additional behavioral characteristics such as onClick, onHoldStart , isPressed and waitForPress.
The property to be a PecAppModul means that the PecButtonClickAndHold is an active class. He can therefore automatically execute his behavioral characteristics as a separate task without being specially treated by us. This is the case, for example, with the onClick operation. It notices that the button has been clicked without us having to program anything. The name already reveals that onClick is a so-called event.
If you later deal more intensively with the UML, you will learn the exact meaning of the slanted spelling. First of all, we remember that, as beginners, we can, so to speak, attach ourselves to such inclined behavioral characteristics. The expert calls this overwriting a virtual function. The tool will support us comfortably.
All in all, it can be said that the PecButtonClickAndHold library block can obviously do everything we need to meet the requirements.
We would also like to use a more sophisticated library module for the display LED. This is the PecLED. We compare these again with the simple PecPinOutput


Here, too, the PecAppModul catches the eye. Obviously, the PecLed does whatever it should do independently. The list of behavioral characteristics already tells us what the PecLed can do. In addition to simply switching on, off and toggle, it can obviously also blinking, flicker, dim and flash briefly. It looks as if this module can also do everything we need.
Let's briefly summarize which system elements we need:


The button and the LED must be connected to the controller and we already know the required library elements and the events that we want to attach to. The rough draft looks like this:

REMEMBER: Behavioral features written in italics = you can overwrite
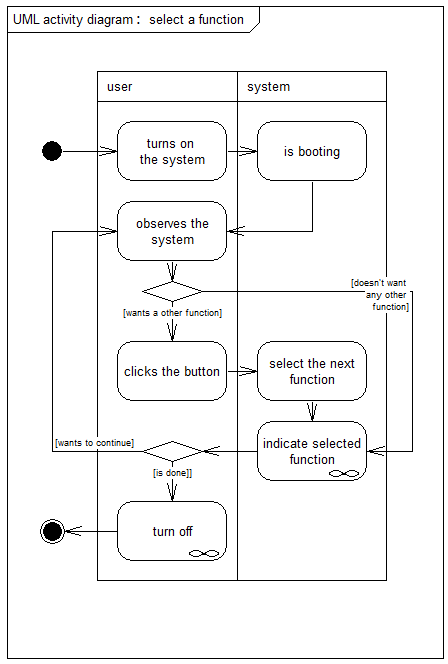
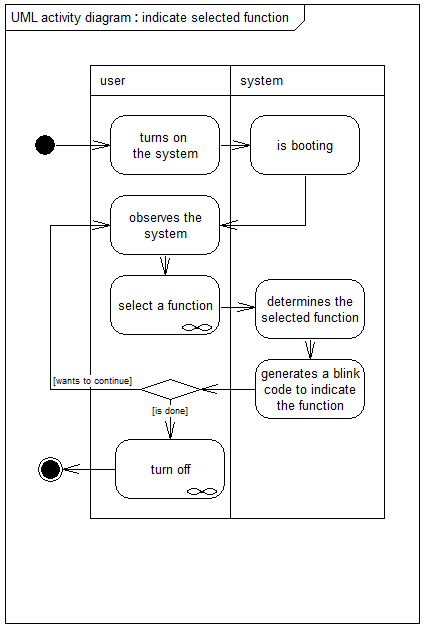
For the realization, here are the functional requirements as use case scenarios for orientation:

Realization
The implementation should contain the elements described in the above design. Since this solution represents a new level of complexity, the following solution should be implemented step by step.

First we do the known steps:
- Create the FunctionKey class and connect it to the controller
- Create class IndicatorLED and connect to the controller
- Drag the PecButtonClickAndHold library element into the diagram and connect it to the FunctionKey class
- Drag the PecLED library element into the diagram and connect it to the IndicatorLED class

The design should now look like this. Please check your class model.

In the next step we want to connecting to the events onClick and onHoldStart by overwriting these behavioral features. Overwriting means that our user class contains operations with the same name. The compiler automatically detects that when these events are called, it is not the operations of the PEC elements in the library that have to be called but the operations in our application. Proceed as follows:
- drag a new element Operation from the object library onto the class FunktionKey
- The tool now offers you all overwritable operations for selection in a dialog
- select the Operation ButtonClickAndHoldBase::onClick():void
- confirm the selection with the Finish button

Repeat these steps for the ButtonClickAndHoldBase::onHoldStart():void operation.

After these steps, your class model should look like this. Please verify your class diagram.
Now we can enter the C ++ code for the required functionality.

FunctionKey::onClick():voidapp.indicatorLED.nextBlinkCode();

FunctionKey::onHoldStart():voidapp.indicatorLED.off();
The effort involved in constructing the class model is now rewarded with amazingly simple code. We can now build and test the application.
Test
Build the solution. Correct any spelling mistakes. Transfer the executable program to the program memory of the controller.
- Build (compile and link)
- upload (flashing)
- connect …


Video summary
Learned and established work steps:
- Create and open class diagram
- Use templates
- Use Navigator and Explorer
- Use library blocks
- Connect classes
- Overwrite operations
- Create source code in the operations
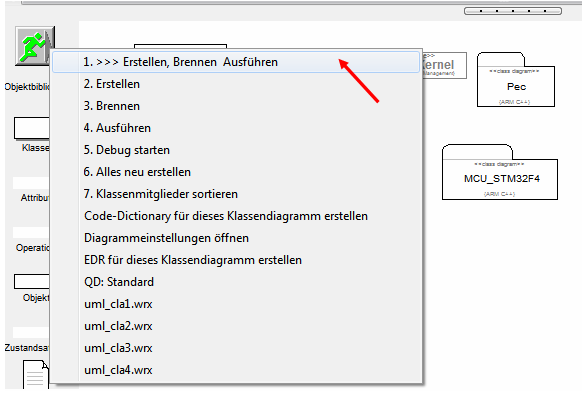
- Create and burn an ARM application in the class diagram
Exercise
To practice, expand the application by a reaction when releasing the function key after holding it for a long time (onHoldEnd). When the key is released, the display LED should flash briefly.